
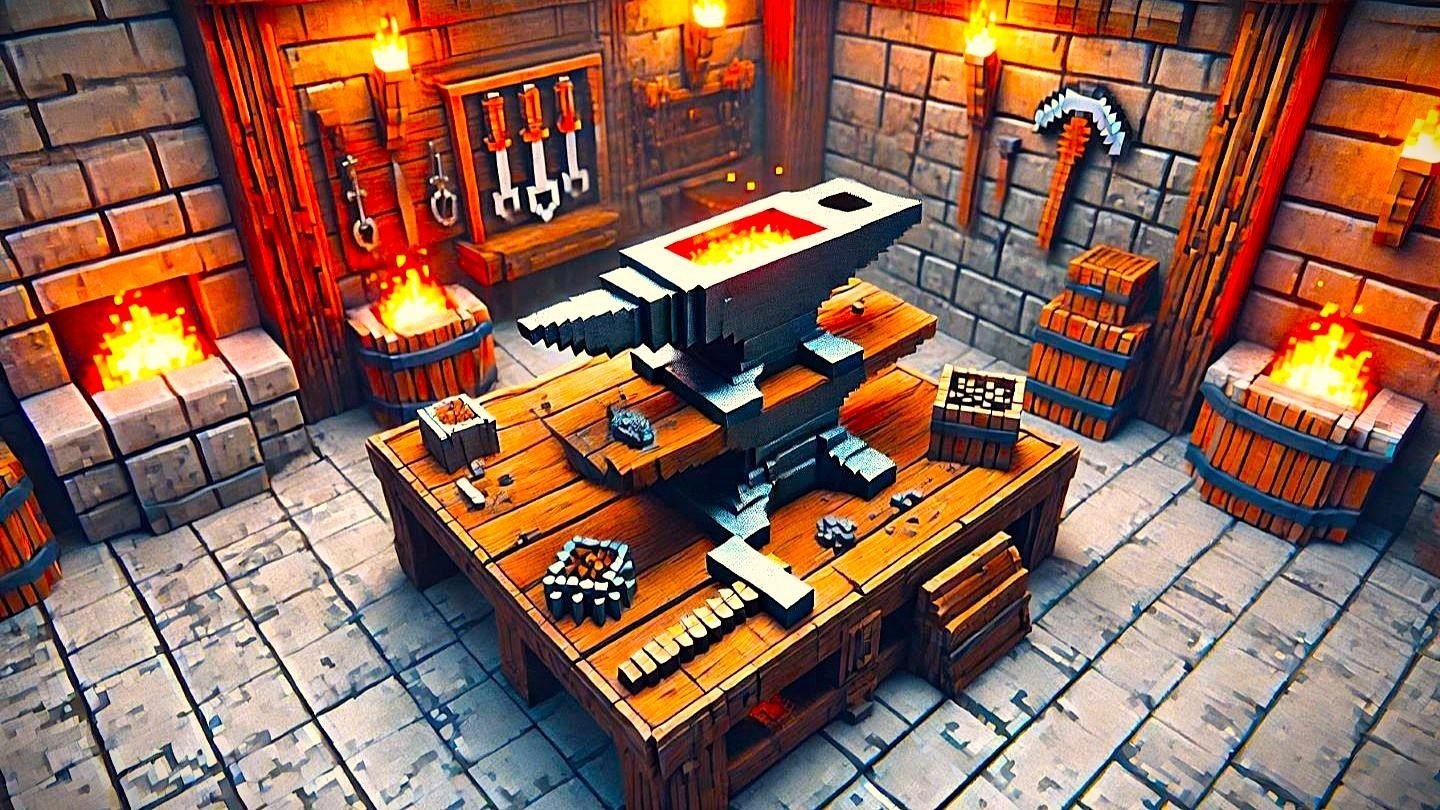
In Minecraft, there are many blocks that help create and upgrade items, but none of them compare to the smithing table. Thanks to it, you can obtain the most powerful tools and the strongest armor, which will be useful in the late stage of the game.
How to Make a Smithing Table in Minecraft?
Although the resources for a smithing table are easily accessible, there’s no point in using it prematurely. It becomes truly useful only when you have diamond equipment and access to netherite. Until then, it’s more reasonable to invest resources in basic buildings and tools.
The crafting recipe is extremely simple: you only need two iron ingots and four planks of any wood. They are easy to obtain, especially if you already have basic tools and have started exploring mines.
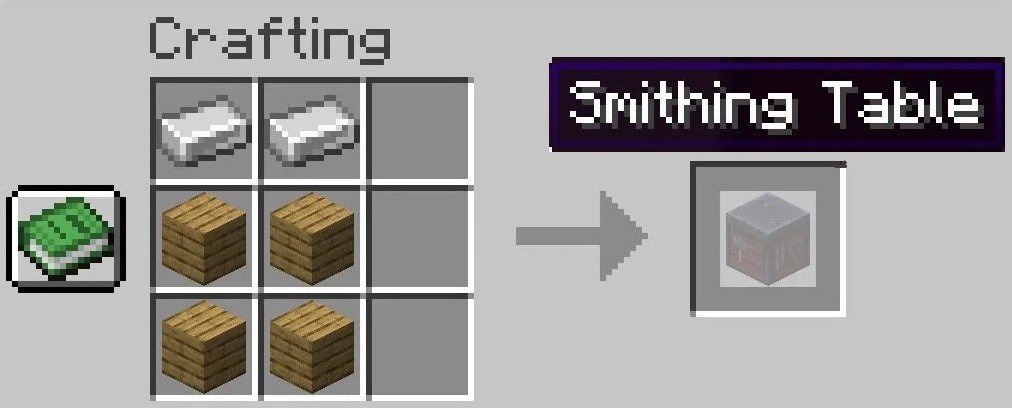 Image: thatvideogameblog.com
❓ Where to get crafting materials:
- Iron ore is found in mines or caves below sea level. After smelting it in a furnace, you get iron ingots.
- Any wood is suitable for making planks. One block of wood will yield four planks right away, so you can collect them literally in the first minutes of the game.
🛠 When you have everything you need, place the materials on the crafting table in the correct order:
- In the first two slots of the top row, put the ingots.
- Below them, in the middle and bottom rows, place two wooden planks each also in the first two slots.
- Leave the third column empty.
- When the smithing table appears on the right, take it into your inventory.
If you don’t feel like spending resources, you can skip crafting the smithing table and just find one. Sometimes it appears in villages most often in the houses of weaponsmiths. Just explore a few buildings, and you might find the required block ready to use. If necessary, you can take it by simply breaking it with any pickaxe.
How to Use a Smithing Table in Minecraft?
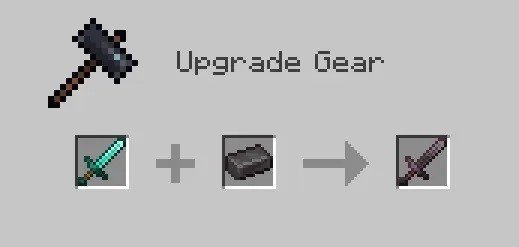 Image: beebom.com
The main purpose of the smithing table is to upgrade equipment and move it to a new level of durability. With its help, diamond items whether a sword, armor, or tool can be turned into sturdier netherite versions. To upgrade, you need one diamond item and one netherite ingot.
Inside the table’s interface, place the diamond item in the left slot and the netherite ingot in the right slot. After that, a new version of the item will appear in netherite form. All enchantments and the level of durability are preserved, which makes this method especially beneficial when enhancing already enchanted gear.
The principle is very similar to an anvil, but the smithing table does not require experience and does not increase the cost of subsequent repairs, which makes it especially convenient.
How to Decorate Armor on the Smithing Table?
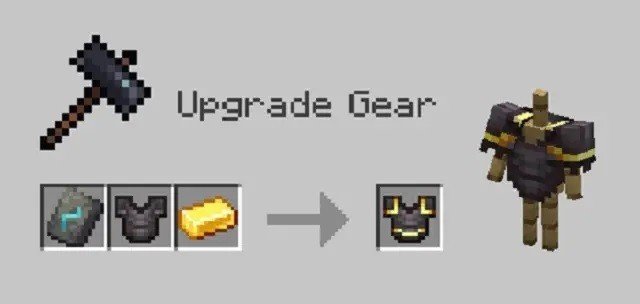 Image: beebom.com
In addition to upgrading equipment, the smithing table allows you to decorate armor using special templates Armor Trim Templates. They add unique patterns to armor without affecting its protective properties, giving your character a personalized look.
Each template reflects the style of the structure it was found in: fortress, bastion, ship, temple, and others. There are 11 trim types in the game, and each can be combined with different colors.
🛠 To add a pattern to armor, you need to:
- Place the trim template in the first slot.
- Insert the piece of armor (iron, diamond, or netherite) into the second slot.
- Place the colored material in the third slot to set the color (for example, redstone, lapis lazuli, emerald, gold, quartz).
The result will be the same item but with a unique visual design. The template disappears in the process, but you can clone it just combine it with a diamond and the required block. This allows you to create copies without having to return to structures for a new one.
How to Assign a Villager’s Profession Using a Smithing Table?
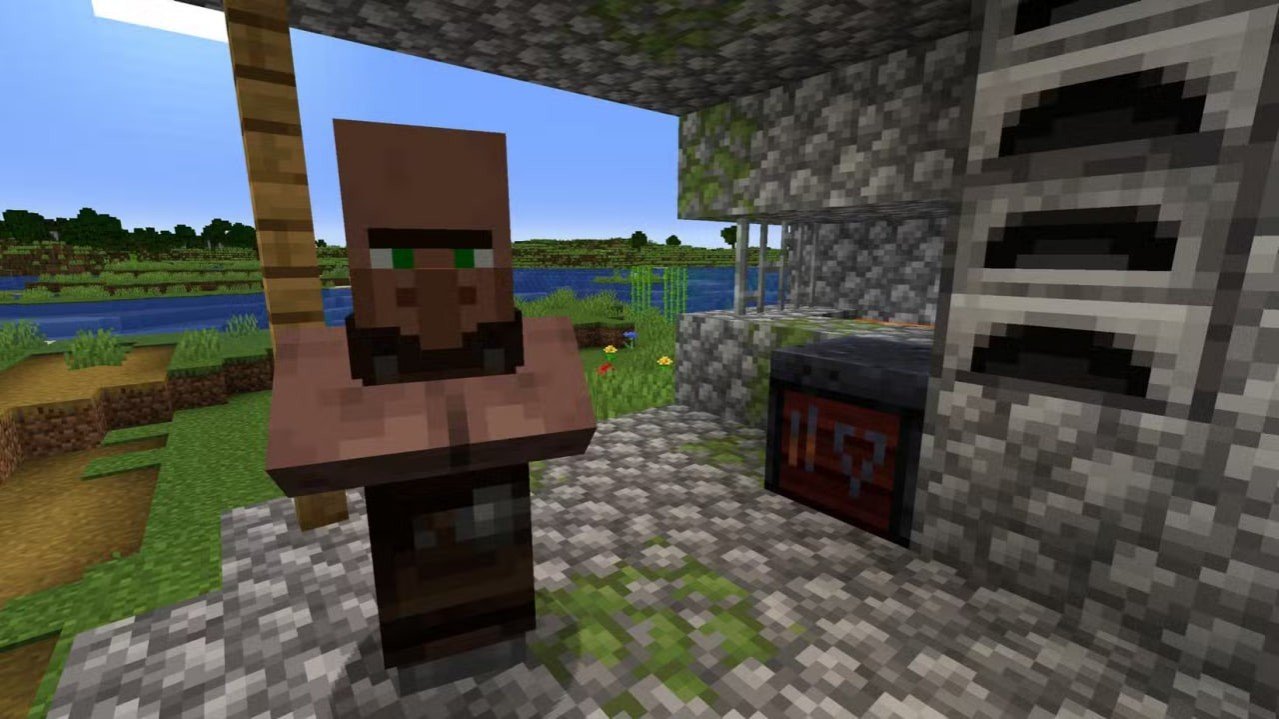 Image: screenrant.com
If there is an unemployed villager in a village, you can place a smithing table next to them and they will become a weaponsmith. Such a villager trades tools: at first they offer simple options, but with each trading level, more valuable items become available, including enchanted diamond and netherite ones.
The leveling process goes step by step: Novice Apprentice Journeyman Expert Master. The higher the level, the better the assortment.
✅ To make a villager become a weaponsmith, keep in mind a few conditions:
- They must not have another profession. Only an unemployed villager can choose the smithing table as a workstation block.
- The table must be nearby. You need to place it within the village so the villager can approach and interact with it.
- You can change the profession before the first trade. If you remove the table before the villager offers their first items, they will become unemployed again and can choose another workstation block.
If the villager does not turn into a weaponsmith, make sure they are truly free (they have no profession and are not assigned to another block), and that they can physically reach the table nothing should block their way.
Blocks like the smithing table provide access to unique features that are unavailable through regular crafting. They make the game deeper and more diverse, and using them correctly helps not only to survive but also to obtain rare items with minimal effort.
Main image: ensigame.com


0 comments